A patient presents 3 days after a lung biopsy with shortness of breath and chest pain. He has a normal HR and BP but SpO2 is 92% on non-rebreather at 15lpm. On bedside ultrasound, he has absent lung sliding on the right, and CXR confirms a large pneumothorax without midline shift, pictured above. In addition to paging thoracic surgery, you get set up to do a pigtail catheter. Here is a review of the procedure, inspired by Drs. Angela Chen and Danish Ahmad.
Indications: simple pneumothorax (spontaneous or non-penetrating trauma), malignant effusion, parapneumonic effusion (not empyema or hemothorax)
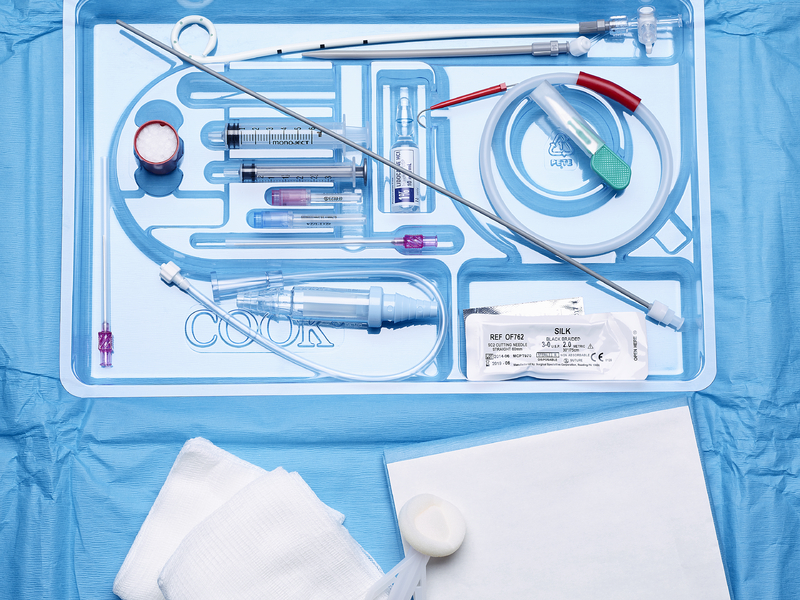
Supplies:
- The Wayne pneumothorax pigtail catheter kit pictured below (stocked in both Resus and the cardiac room)
- Chloraprep (if you like to use more than the 1 included in the kit)
- Sterile gloves + gown
- Bouffant cap + face shield
- 5cc sterile saline
- Size 0 silk suture (pro tip from thoracic surgery — because the 2-0 silk included in the kit often breaks)
- Pleur-evac or other chest tube drainage system
Site selection: The most common site for chest tube placement is in the 4th or 5th intercostal space in the midaxillary line, and this site works fine for pigtail catheters as well. However, many thoracic surgeons prefer to place pigtails in the 2nd intercostal space midclavicular line for a pneumothorax given that air rises. There may also be less subcutaneous tissue to go through anteriorly than on the sides, and I’ve been told it is more comfortable for patients, though an anterior scar may also not be cosmetically preferable. I could not find any evidence of increased risk for damage to the mediastinum or subclavian vein or artery on anterior approach despite proximity to these structures.
Pigtail Catheter Insertion:
- Position the patient with the head of the bed elevated at 30-60 degrees and their ipsilateral arm raised up over their head if possible, place them on the monitor, provide supplemental O2.
- Clean the insertion site, gown up, drape the patient, administer local anesthesia.
- Feed the rigid longer stylet into the pigtail to straighten it for insertion.
- Draw up a few cc of saline into a syringe, attach to the guide needle, and insert over the 2nd rib at a 60 degree angle while aspirating. When you see air bubbles (or fluid) in the syringe, you’ll know your needle is in the pleural space. Stabilize your needle, do not advance further.
- Using Seldinger technique (just like central line placement), take off the syringe, feed the guidewire ensuring it advances freely, remove the needle, nick the skin, insert the dilator over the guidewire and through to the pleural space, then remove the dilator.
- Feed the loaded catheter + stylet over the guidewire to the desired depth
- Remove the guidewire and stylet simultaneously
- Secure the catheter with 0-silk similar to securing a chest tube, and cover with xeroform and tegaderm to form an occlusive dressing
- Attach the pigtail catheter to the drainage bag connector and then to the chest tube drainage system on low wall suction.
- Get a post-procedure CXR to verify tube placement and lung re-expansion
- here is a video of pigtail insertion on a mannequin and on a person
Complications: similar to those seen in larger bore chest tube placement, including bleeding from an intercostal artery (or internal mammary artery if going in the midclavicular line), solid organ injury, diaphragmatic injury, infection, and re-expansion pulmonary edema.
References:
Roberts and Hedges’ Clinical Procedures in Emergency Medicine and Critical Care
