Why should I care about this?
Ok, so it may not be that interesting, however, we should still review how to responsibly remove a helmet. In NYC, we very rarely encounter injured patients with a helmet on and that’s probably because they were never wearing one to begin with, the patient removed it, or EMS removed it. So depending on the practice setting and local EMS protocols, patients may arrive with a helmet in place and it will fall on you as the EM doc to safely remove the helmet without causing harm.
What should I know about helmets?
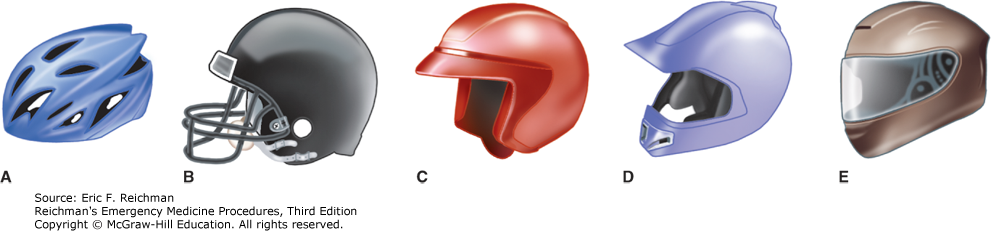
Helmets come in different flavors and sizes and are used for different activities (e.g. sports, motorcycles, scooters), but all serve the same purpose – to protect the skull.
Anatomy of the helmet:
- Outer layer: hard plastic, polycarbonate or fiberglass shell
- Inner layer: foam, inflatable air bladders, fabric
- Miscellaneous: straps, face cages, visors
- These may be screwed into the helmet or have a quick release mechanism
Some important things to note here:
- Chin straps keep the helmet secured in position so removing it will cause the head and neck to move within the helmet
- Football and hockey players wear shoulder padding, which adds additional considerations
- Most helmets are nonmetallic and do not interfere with CT imaging should you need to image the patient before removing helmet
What equipment do I need?
Shears
Screwdriver
Cast saw
Towels
Cervical collar
Preparation
- Perform a neurological exam prior to removing the helmet
- If the patient is able to cooperate, ask them to notify you immediately if they experience numbness, neck pain, paresthesias or tingling during removal
- Let the patient know that the helmet removal has the potential to cause complications and even worsen existing c-spine injury
- Clear all removal parts from the helmet (e.g. straps, visor, face cage, etc) and glasses the patient may be wearing
- Helmets may have a quick release button to release straps and cages, otherwise use a screwdriver to release these components
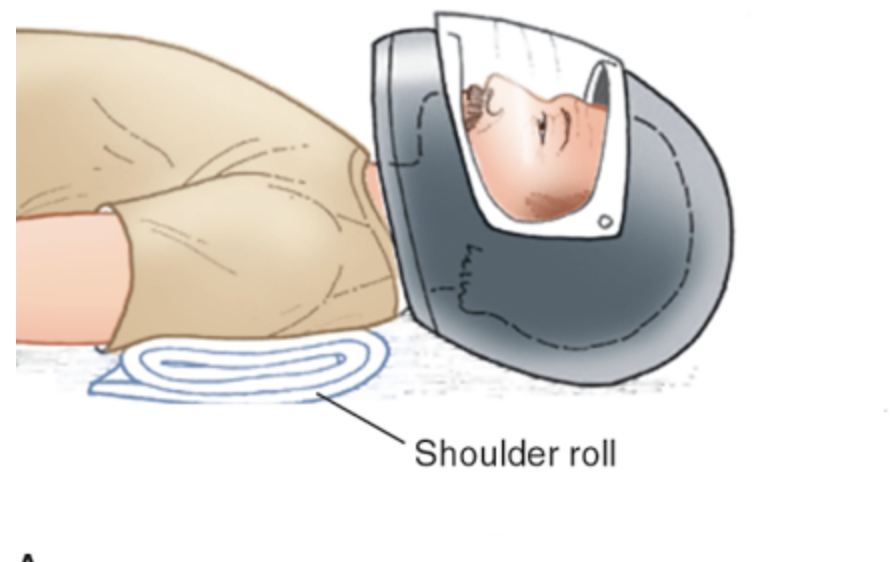
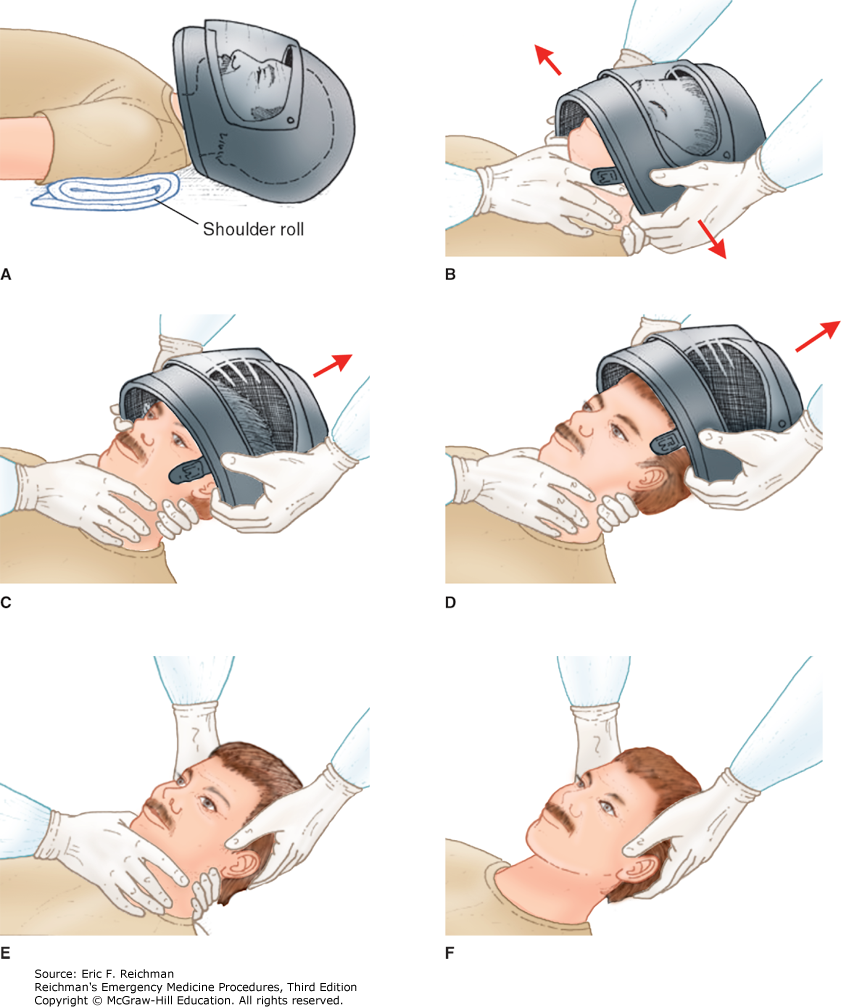
- If the patient is not wearing shoulder pads, place rolled towels under the shoulders
- This minimizes excessive flexion of the c-spine when the helmeted patient is placed supine
- For the patient with shoulder pads, split open the front of the shoulder pads (shears, cast saw, whatever it takes- get creative!)
Technique
We will review several techniques you can use to remove the helmet. Helmet removal should ideally be performed with an assistant to minimize risk of injury to yourself and the patient. Regardless of technique, take great care to avoid hyperextending the neck during the removal process.
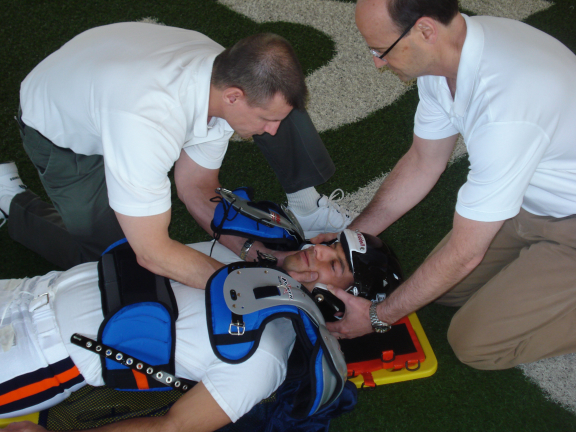
Manual Two Person technique
Steps:
- Stand at the head of the bed and have your assistant stand to the side of the patient
- Your assistant should have access to the head and neck
- Place one of your assistant’s hands behind the occiput and upper neck
- Place the other assistant’s hand under the patients mandible with the chin resting in the first webspace and fingers at the angle of the mandible
- Place the heels of both your hands at the side of the helmet and insert your fingers into the space between the helmet and patient’s face to create space
- Remove the helmet by pulling along the plane of the head
- Avoid hyperextending the neck
- After removing the helmet, use your hands to hold in-line immobilization while your assistant placed the cervical collar
Troubleshooting:
- If the lower part of the helmet is stuck at the level of the nose, tilt the helmet posteriorly and pull until you clear the nose. After clearing the nose, return the helmet to the neutral position and continue to pull off the helmet
- If the patient reports pain or neurological symptoms, stop immediately and proceed with the cast saw technique instead
Cast Saw Bivalve technique
- Requires two personnel and allows for removal without c-spine movement
- Indications:
- Patient with neurological injury
- Abnormal c-spine imaging
- Patient with suspected head or neck trauma
Steps:
- Remove any chin straps or plastic eye shields
- Prepare the patient
- Ask the patient to keep eyes closed to avoid ocular trauma and foreign bodies
- Place a moist towel over the face if the patient is unconscious and cannot cooperate with (a)
- Emphasize that they should not move under any circumstances
- The assistant will now immobilize the patient’s head and neck
- Using the cast-saw, cut the helmet from ear to ear in the coronal plane
- Cut any inner padding, foam or fabric with shears
- Gently remove the anterior portion of the helmet
- Slide out the posterior portion of the helmet while your assistant holds in-line immobilization
- Hold in-line immobilization and have your assistant place a cervical collar
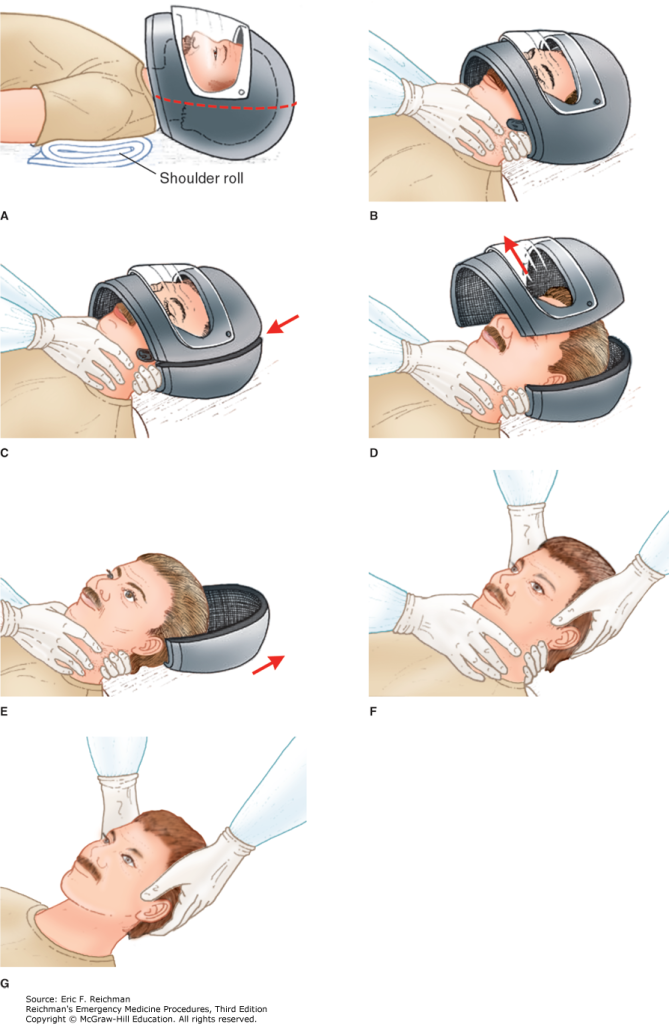
Cast Saw Face Mask removal technique
This technique allows for removal of the front part of a full-face helmet, which can be useful when the airway needs immediate attention.
Steps:
- Remove any chin straps or plastic eye shields
- Prepare the patient
- Ask the patient to keep eyes closed to avoid ocular trauma and foreign bodies
- Place a moist towel over the face if the patient is unconscious and cannot cooperate with (a)
- Emphasize that they should not move under any circumstances
- The assistant will now immobilize the patient’s head and neck
- Place your nondominant hand between the patients face and inner helmet
- With your dominant hand holding the saw, begin cutting the helmet at one side of the face mask and repeat for the other side
- Remove the outer shell layer and cut the inner foam or fabric with shears
- Gently remove the helmet and avoid c-spine hyperextension during removal
- Hold in-line immobilization and have your assistant place a cervical collar
Levitation technique
This technique can be used in the helmeted patient with shoulder pads. However, you will need 6-8 people to successfully perform this technique.
Steps:
- Position two personnel on each side of the patient, they will be perform the lifting
- Two at the torso
- Two at the lower extremities
- One person will hold in-line immobilization from below
- Position this person to the side of the patient’s torso
- One person will hold in-line immobilization from the head of the bed
- This assistant will also remove the helmet during the lift
- The last person will be responsible for removing the shoulder pads
- In a coordinated fashion, assistants will carefully lift the patient while simultaneously removing the shoulder pads and helmet
- Safely return the patient and place a cervical collar
Post Removal
- Place a cervical collar
- Repeat the neurological exam
- Examine the patient for injuries such as abrasions, lacerations, corneal abrasions
- Complete the rest of your trauma evaluation as needed
References
Sanello AN, Üner A. Helmet Removal. In: Reichman EF. eds. Reichman’s Emergency Medicine Procedures, 3e. McGraw Hill; 2018. Accessed December 29, 2022. https://accessemergencymedicine-mhmedical-com.eresources.mssm.edu/content.aspx?bookid=2498§ionid=201304064
