The pursuit of mastery over cardiovascular emergencies demands a rough familiarity with implanted devices which includes why they get implanted in the first place (indications), how they work, how they malfunction, and how they affect the EKG., among other features. Today we’ll we’ll start with the basics of implanted pacemakers including indications, anatomy, and radiography.
Generally speaking, patients are suitable for pacemaker implantation when they exhibit 1) symptomatic bradycardia or symptomatic chronotropic incompetence (i.e. inability to generate an age appropriate heart rate during exertion) 2) third degree AV block 3) Mobitz Type II second degree AV block 4) carotid sinus mediated recurrent syncope 5) sustained PAUSE-DEPENDENT ventricular tachycardia and 6) severe CHF i.e. with electromechanical ventricular dyssynchrony.
Complications include infection, upper extremity venous thrombosis, hemothorax, pneumothorax, and pocket hematoma.
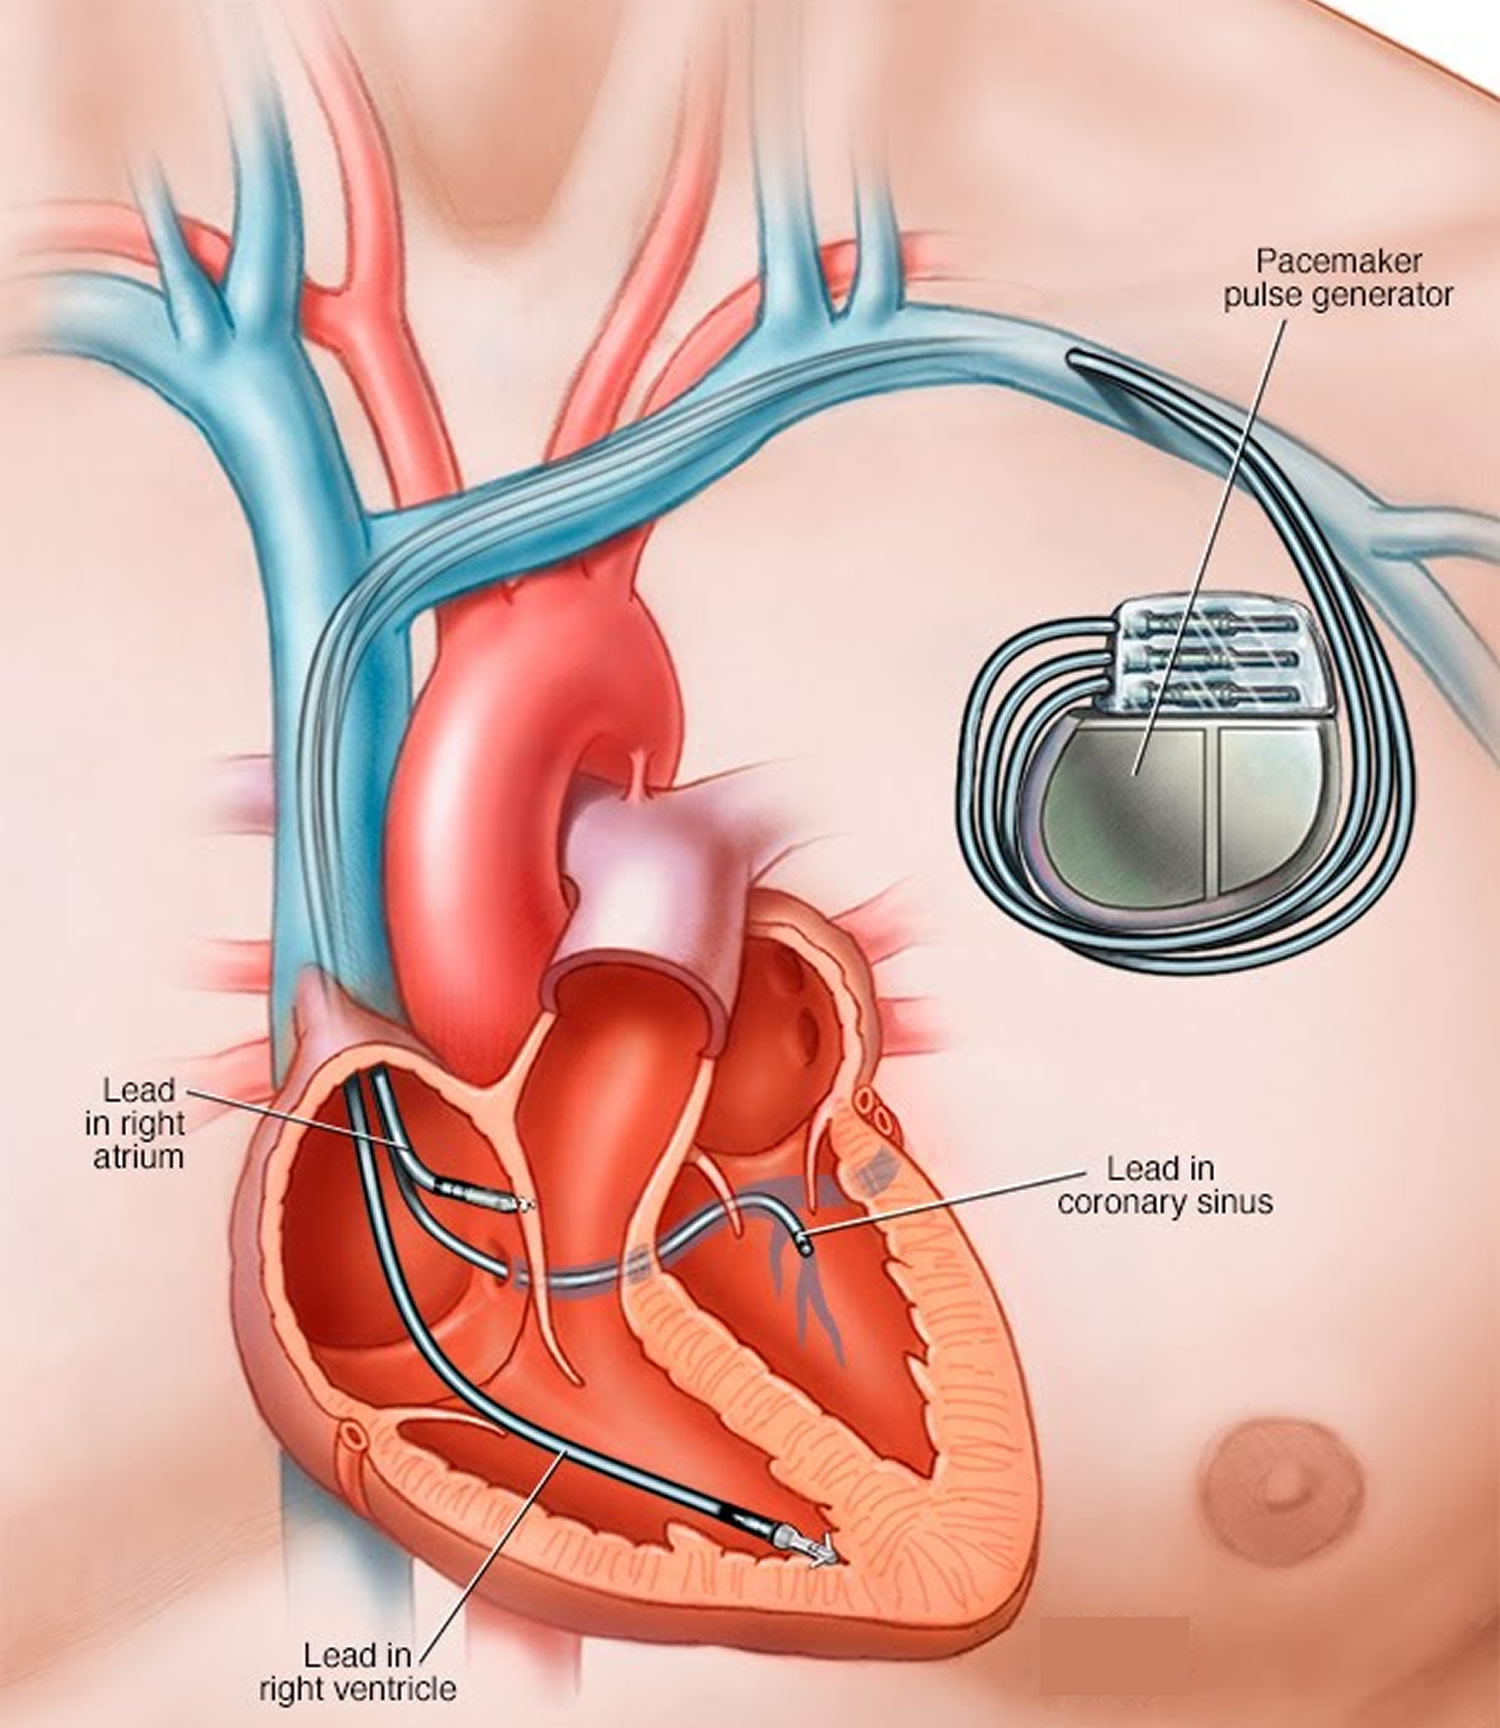

A pacemaker consists of a pulse generator usually implanted subcutaneously usually in the left infraclavicular fossa with leads traversing the ipsilateral subclavian vein. The typical “dual chamber” pacemaker will have one lead tip implanted in the right atrial appendage and a second tip in the right ventricular apex. The above picture has a third lead traversing the coronary sinus for placement in the left ventricular wall (i.e. biventricular pacing).

That’s it for part 1. In the next post we’ll cover pacemaker function and how to interpret their unique electrocardiographic morphologies.
